 Save
Save My neighbor threw a surprise birthday party last summer, and I showed up with nothing but a vague promise and thirty minutes to spare. Standing in her kitchen, surrounded by the usual party chaos, I remembered seeing a blooming quesadilla ring on someone's Instagram months earlier and thought, why not? Twenty minutes later, this golden, flower-like creation came out of the oven, and I watched people crowd around it before the cake even made an appearance. That's when I realized some appetizers deserve to be the main event.
I made these for my daughter's study group, not knowing half her friends were vegetarian. What could have been awkward turned into the easiest save ever—the black beans and roasted peppers made it feel intentional, like I'd planned it that way all along. One friend came back two weeks later specifically asking if I'd make them again.
Ingredients
- 16 small flour tortillas (5–6 inches diameter): Small tortillas fold cleanly without cracking and create those perfect triangle pockets that hold filling without tearing.
- 2 cups shredded cheddar cheese: The sharp notes cut through richness and give you that classic quesadilla flavor people expect.
- 2 cups shredded Monterey Jack cheese: This melts smoother and creamier than cheddar alone, creating that stringy pull everyone loves.
- 1 cup cooked black beans, drained and rinsed: They add protein, texture, and earthiness that makes this feel substantial rather than just cheese and grease.
- 1 small red bell pepper, finely diced: The sweetness balances the savory cheese, and the small pieces distribute evenly so every bite has flavor.
- 1 small green onion, thinly sliced: A whisper of onion freshness that keeps everything from feeling too heavy.
- 1/2 teaspoon ground cumin: This is the spice that makes people say they taste something special without being able to name it.
- 1/2 teaspoon chili powder: Warmth without heat, building flavor layers rather than just making things spicy.
- 1/2 teaspoon smoked paprika: The secret ingredient that gives the filling depth, like something's been slow-cooked all day.
- Salt and black pepper, to taste: Taste as you go—the beans and peppers bring their own saltiness.
- 2 tablespoons unsalted butter, melted: Brushed on the outside, this turns the tortillas golden and slightly crispy rather than chewy.
- 1/4 cup fresh cilantro, chopped: This brightens everything right before serving and adds a final fresh note.
- 1 cup prepared salsa, sour cream, and optional avocado and lime: These sides are where people express their preferences—some want cool and tangy, others want creamy.
Tired of Takeout? 🥡
Get 10 meals you can make faster than delivery arrives. Seriously.
One email. No spam. Unsubscribe anytime.
Instructions
- Get your oven ready and set the stage:
- Preheat to 400°F and line your baking sheet with parchment paper so nothing sticks and cleanup becomes effortless. This temperature gets your tortillas golden in exactly the right window where cheese melts but tortillas don't toughen.
- Mix your filling like you're building flavor:
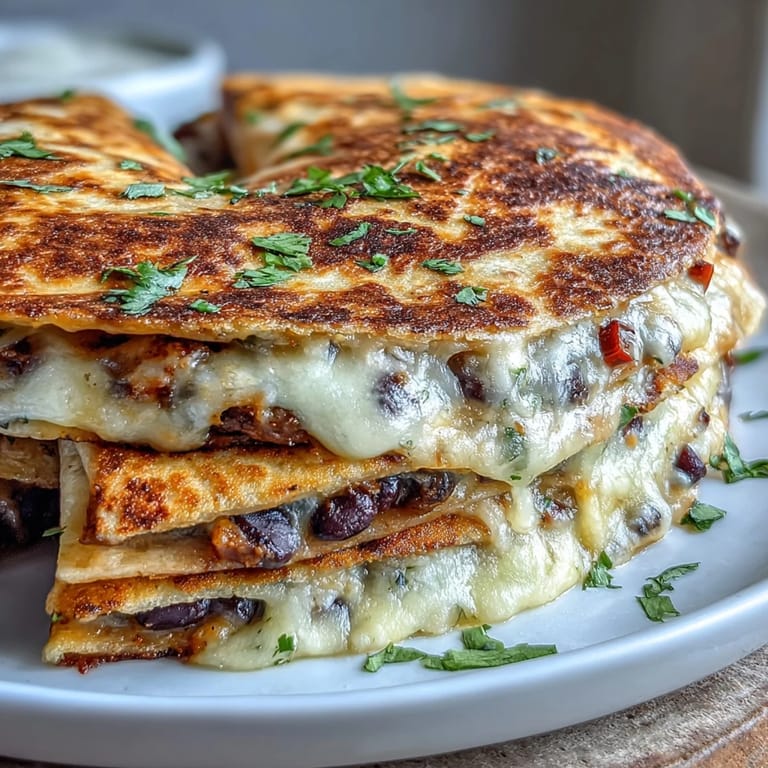
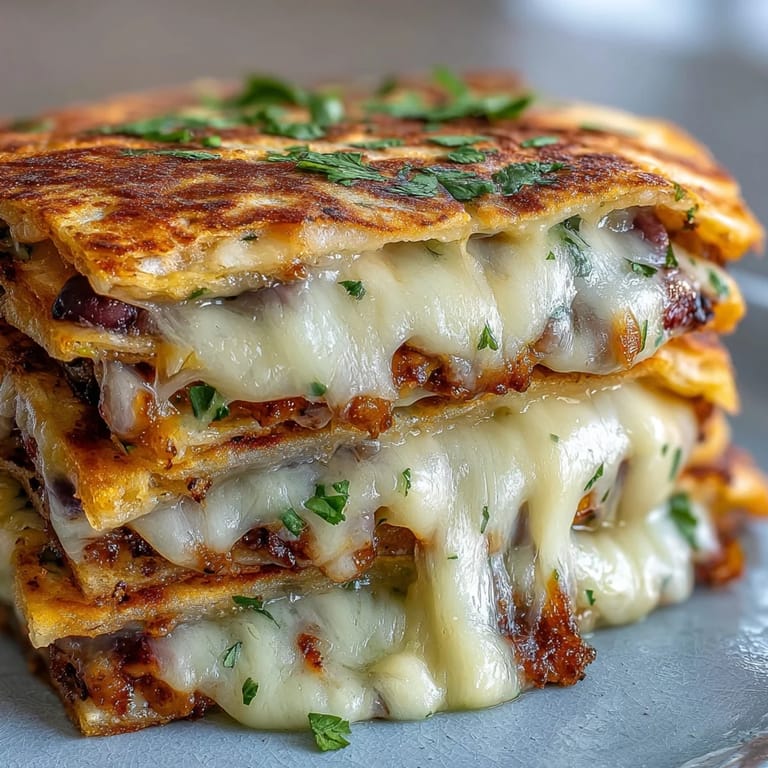
- Combine both cheeses, black beans, diced red pepper, sliced green onion, cumin, chili powder, smoked paprika, salt, and pepper in a large bowl and stir everything together until evenly distributed. Taste a tiny pinch if you want—you're looking for warmth and depth, not heat.
- Cut and fill your tortilla pieces:
- Cut each tortilla in half to create semicircles, then place about a tablespoon of filling on each one and fold the straight edge over to form a triangle. Press gently so the tortilla seals but doesn't tear, and you'll feel the filling stay put.
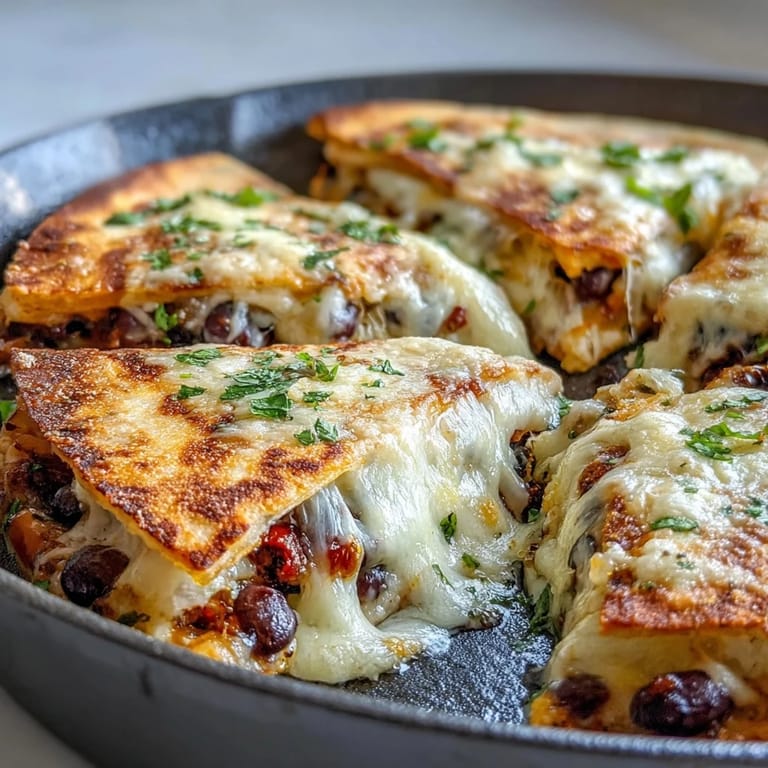
- Arrange them into a blooming ring:
- Lay the triangles point-side inward on your prepared baking sheet, overlapping them slightly so they form a tight circle that looks like a flower opening up. This arrangement isn't just pretty—it means they bake evenly and hold together as one stunning piece.
- Brush and bake until golden:
- Lightly brush the tops with melted butter, then slide the whole sheet into your preheated oven for 18–20 minutes until the tortillas turn golden and cheese visibly melts through the seams. You'll know it's done when the smell hits you and the points start crisping.
- Garnish and serve from the center:
- Slide the whole ring onto a serving platter, scatter fresh cilantro over top, and arrange your dipping bowls (salsa, sour cream, and optional avocado) in the center. People will instinctively know to eat from the outside working in, creating this natural flow that feels intentional.
 Save
Save I brought these to a work potluck where everyone usually just grabs random things standing up, but watching the whole team circle around this blooming ring and actually sit down together felt like I'd done something bigger than just bring food. Sometimes the presentation changes everything.
The Magic of the Flower Shape
The blooming ring isn't just Instagram-bait—there's actual logic to it. When triangles overlap in a tight circle, they brace each other during baking, staying upright instead of flopping around on the pan. The points facing inward mean they crisp slightly while protected, and people naturally pull from the outside edge, which creates that satisfying unveiling moment. Plus, your dipping station in the middle becomes the centerpiece, making it feel intentional rather than like condiments somebody threw together.
Timing and Temperature Secrets
Four hundred degrees sounds hot, but it's actually the sweet spot where tortillas soften enough to fold without cracking, then crisp on the outside while cheese melts all the way through. Too low and everything stays rubbery; too high and you'll have burnt edges before the filling heats through. The 18–20 minute window matters more than you'd think—set a timer for 15 and start checking at the 17-minute mark so you catch that golden moment before anything tips toward overdone.
Making It Your Own
The base recipe works perfectly as written, but this is the kind of dish where variations feel natural rather than like you're changing something sacred. If you're cooking for meat-eaters, crumbled chorizo adds smoky richness, or shredded cooked chicken brings heartiness without overpowering the cheese. Sautéed mushrooms and caramelized onions create a completely different vibe that still works beautifully, and everything tastes even better when you use ingredients people actually want to see in their food.
- Add seasoned cooked chicken, chorizo, or sautéed mushrooms to turn this into something your specific crowd will devour.
- Use gluten-free tortillas if you're cooking for people who need them—they crisp up just as nicely when brushed with butter.
- Prep the filling the day before and keep it covered in the fridge, then assemble and bake when guests arrive for the freshest result.
 Save
Save This recipe became a regular in my rotation because it bridges that gap between looking impressive and actually being easy. Make it once, and people will ask for it again.
Recipe FAQ
- → Can I prepare the quesadilla ring ahead of time?
You can assemble the ring up to 2 hours in advance, cover it with plastic wrap, and refrigerate. Brush with butter and bake just before serving for the best crispy texture.
- → What other fillings can I use?
Try shredded chicken, cooked chorizo, sautéed mushrooms, or roasted corn. You can also add jalapeños for heat or switch up the cheese varieties to suit your taste.
- → How do I prevent the tortillas from getting soggy?
Don't overfill the tortillas, and make sure to drain black beans thoroughly. Bake immediately after assembly and serve right away for maximum crispiness.
- → Can I make this gluten-free?
Absolutely! Simply substitute gluten-free tortillas for regular flour tortillas. Check all other ingredient labels to ensure they're certified gluten-free.
- → What size baking sheet works best?
A large baking sheet (at least 18x13 inches) works best to accommodate the full ring arrangement. The ring should be about 10-12 inches in diameter when assembled.
- → How do I get the tortillas to stay in the ring shape?
Overlap each triangle slightly and press gently as you arrange them. The cheese will melt and help hold everything together during baking.