 Save
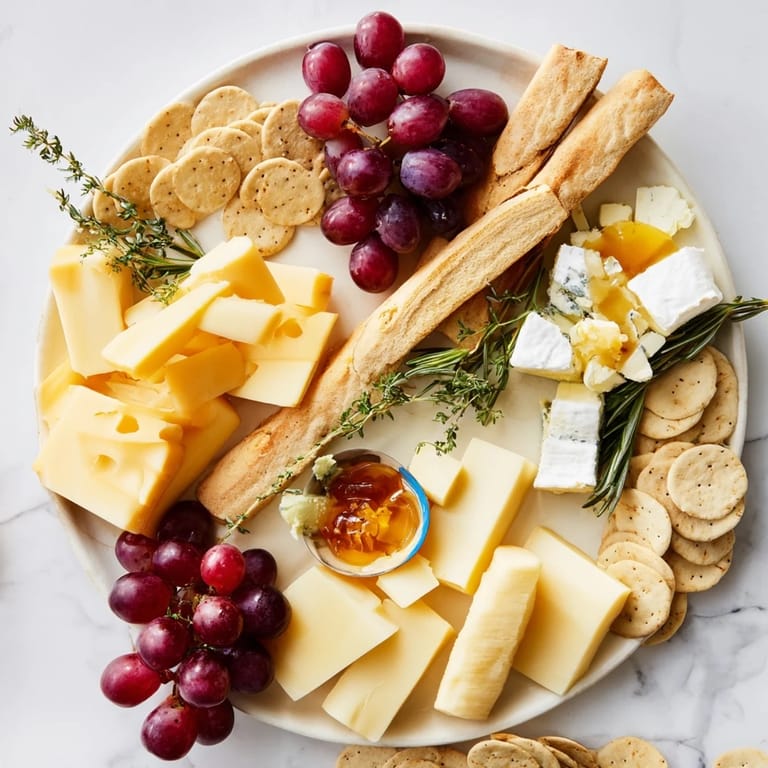
Save I'll never forget the feeling of standing in my new kitchen for the first time, surrounded by moving boxes and the overwhelming realization that I had no furniture yet—just bare counters and big dreams. My closest friends showed up within hours with a bottle of wine and genuine excitement, and I knew I couldn't let them leave without something to celebrate with. That's when the idea hit me: why fuss with cooking when what we really needed was time together? I pulled together every cheese I could find, grabbed crackers from my pantry, and arranged them on a wooden board like I was conducting an orchestra. Watching everyone gather around, laughing and building their own little bites, I realized that this simple spread had created exactly the moment we needed—casual, generous, and full of possibility.
I've since hosted dozens of gatherings around boards like this one, and I've learned that the magic isn't really about the ingredients—it's about the permission you're giving people to relax and be themselves. When someone doesn't have to wait for a composed dish or sit formally at a table, they actually linger longer, chat more freely, and feel genuinely welcome in your space. That's what an open house spread really does.
Ingredients
- Sharp Cheddar (250 g, cut into blocks): This is your anchor cheese—bold enough to stand on its own but familiar enough that everyone will reach for it. Cutting it into substantial blocks rather than slices gives guests something satisfying to hold.
- Creamy Brie (250 g, cut into wedges): The sophisticated touch that makes people feel like they're at something special. Cut into actual wedges so guests can spread it naturally rather than crumbling it everywhere.
- Manchego (200 g, sliced): A Spanish sheep's milk cheese with a subtle sweetness—it adds international flair without requiring explanation, and the nutty notes bridge perfectly between sharp and mild.
- Blue Cheese (200 g, crumbled or in blocks): The polarizing choice that the adventurous guests absolutely love. Offer it in both forms so people can decide how much boldness they want.
- Smoked Gouda (200 g, cubed): This is the crowd-pleaser that converts skeptics. The smoke adds depth while the creamy texture makes it approachable.
- Assorted Crackers (1 large box, 350 g): Buy a variety pack so you have thick ones for heavy cheeses, thin ones for delicate spreads, and something seeded for visual interest.
- Baguette (sliced thinly): Toast these lightly before the party if you want them to hold up better throughout the event, but fresh is absolutely fine if you'll be refreshing them.
- Breadsticks (150 g packet): These add vertical interest to your board and give a different texture option without any prep.
- Red and Green Grapes (2 cups total, in small clusters): Keep them in small bunches so guests can grab a few without the awkwardness of separating from a giant cluster. This is one thing you prep in advance—don't wait until guests arrive.
- Apples (2, sliced fresh): Toss with fresh lemon juice the moment you slice them—this isn't optional if you want to avoid the brown oxidation. I learned this the hard way at my first gathering.
- Dried Apricots and Figs (1 cup total): These are your secret weapon for bridging sweet and savory. They pair unexpectedly well with sharp cheeses and look beautiful scattered across the board.
- Roasted Almonds and Walnuts (2 cups total): Buy them already roasted so you have nothing to do. Put them in small bowls so nuts don't scatter across the board, and they're easier for guests to control.
- Honey (1/2 cup in a small bowl): This seems simple until you watch someone drizzle it over blue cheese and walnuts, and their face lights up. Provide a small spoon so people don't feel awkward about it.
- Fig or Apricot Jam (1/2 cup in a small bowl): The sweet-savory moment that changes everything about how people taste the cheeses. It transforms a basic spread into something memorable.
- Whole Grain Mustard (1/3 cup in a small bowl): Texture and tang that make sharp cheeses sing. The seeds are prettier than smooth mustard and add visual appeal.
- Cherry Tomatoes (1 cup, whole): Don't cut them—whole tomatoes are easier for guests to manage and stay fresher looking throughout the event.
- Baby Carrots (1 cup, raw): These are entirely optional, honest, but they add a pop of orange that photographs beautifully and gives vegetable-focused guests something substantial.
- Fresh Herbs (rosemary and thyme sprigs for garnish): These aren't really for eating—they're for making the board look alive and intentional. Tuck them into gaps between items.
Tired of Takeout? 🥡
Get 10 meals you can make faster than delivery arrives. Seriously.
One email. No spam. Unsubscribe anytime.
Instructions
- Start with Your Largest Canvas:
- Find your biggest board or platter—you want it to feel generous, not crowded. If you don't have a dedicated board, a large cutting board, a wooden platter, or even a clean, flat baking sheet works beautifully. The key is giving yourself real estate to work with.
- Position Your Cheeses with Purpose:
- Arrange the cheese blocks and wedges first, spacing them evenly around the board as if you're placing the main characters in a scene. Leave breathing room between them—this prevents the board from looking chaotic and gives guests clear access to each cheese. The hard cheeses (Cheddar, Manchego, Gouda) are your anchors; the softer ones (Brie, blue cheese) can go in spaces where they won't get crowded.
- Create a Cracker Foundation:
- Fill the spaces between cheeses with generous piles of assorted crackers and baguette slices. Don't be stingy here—people will eat more crackers than you think, and a board that looks abundant feels more welcoming. Lean some crackers against the cheese blocks so they're visibly ready to use.
- Scatter Your Fruit Like You're Painting:
- Nestle bunches of grapes, apple slices, dried apricots, and figs around the board in clusters rather than spreading them thin. Group similar fruits together for visual impact—a little mountain of green grapes next to a cluster of red ones looks intentional and beautiful.
- Add the Small Touches:
- Place small bowls of nuts, honey, jam, and mustard in the remaining gaps. These condiments are the secret ingredients that transform simple cheese and crackers into something memorable, so position them prominently where they're impossible to miss.
- Fill Empty Spaces with Vegetables and Garnish:
- Tuck cherry tomatoes and baby carrots into any remaining gaps—they add color and give lighter-appetite guests something fresh to reach for. Finish by tucking fresh herb sprigs throughout, letting them peek out naturally between other items.
- Provide the Right Tools:
- Set out small cheese knives next to the harder cheeses, spreaders or small spoons for the soft cheeses and condiments, and toothpicks or cocktail forks scattered around the board. This tells guests exactly how to interact with what you've created.
- Stay Present and Refresh Gently:
- Throughout your gathering, do a quiet refresh—add fresh crackers, move items that have shifted, refill the jam bowl if it's running low. You're not fussing; you're caring for your guests' experience.
 Save
Save There was a moment during my housewarming when I watched a shy colleague discover that blue cheese with honey and a walnut was actually delicious, and she kept coming back to that combination all evening. That's when I understood that a board like this isn't just food—it's permission for people to explore, to find what they love, to feel comfortable in your new space. The spread creates dozens of tiny moments of joy.
Building Your Perfect Board
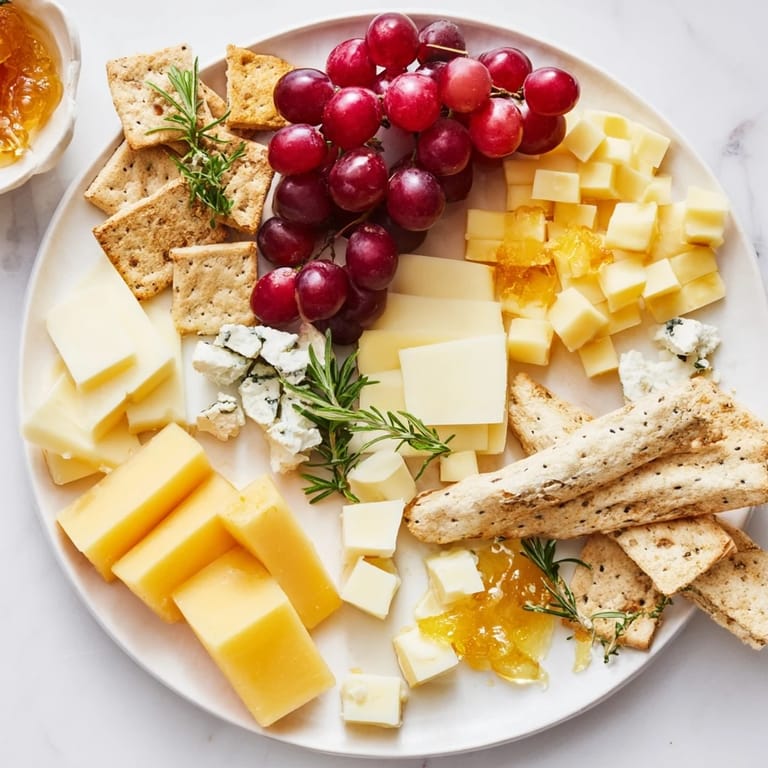
The secret to a board that looks professional and feels personal is understanding the principle of odd groupings and color balance. Rather than arranging items symmetrically, think in threes and fives—three piles of crackers, five grape clusters, three small bowls of condiments. This creates visual rhythm that feels both intentional and natural. Alternate colors deliberately: place the pale Brie near the dark blue cheese, put red grapes opposite green ones, use the golden-brown baguette slices to bridge between cheeses. If your board starts to look too uniform, you can always add a contrasting element—a sprinkle of black sesame seeds on a cracker pile, or a single herb sprig in an unexpected spot. The boards that look effortless actually have quite a bit of intentional design behind them.
Cheese Pairings That Actually Work
Learning which flavors travel together has genuinely changed how I build these boards. Sharp Cheddar loves dried apricots and anything with a touch of sweetness—that's where the honey comes in. Creamy Brie is the bridge cheese; it gets along with nearly everything but especially shines with delicate fruits like figs and a whisper of jam. Blue cheese is the adventurer, begging for bold partners like walnuts, honey, and grapes. Manchego's subtle sweetness connects the softer and harder cheeses, making it easier for guests to move between flavor profiles. Smoked Gouda is the crowd-pleaser that shouldn't be underestimated—it works with almost everything and converts people who think they don't like cheese. I used to overthink these combinations, but I've learned that if it sounds good when you say it out loud, it probably tastes good together. Trust your instincts and you'll never create a bad pairing.
Prep, Timing, and Keeping Everything Fresh
The beautiful part of serving a board is that most of your work happens before anyone arrives. Wash and cluster your grapes the night before if you're feeling organized—they'll stay fresher in the fridge. Cut your cheeses an hour or two before guests come so they have time to firm up slightly (they're easier to eat when they're not ice-cold). Toast your baguette slices about thirty minutes before you want to serve, wrap them loosely in a kitchen towel to stay warm and slightly crispy, or leave them fresh if you prefer softer bread. Slice your apples just before you arrange the board, or just before guests arrive if you've prepared everything else. The crackers, nuts, and dried fruit are practically immortal on a board—they actually improve as they sit because flavors have time to meld. The only items that truly deteriorate are the fresh apple slices and any items guests have touched, so keep a quiet eye on those and refresh as needed. If you're hosting for several hours, bring out small batches of new items rather than putting everything out at once. This creates the sense that you're constantly welcoming people and caring for the experience.
- Set out your board no more than thirty minutes before guests arrive, so everything looks fresh and inviting rather than tired
- If you're worried about anything browning or drying out, keep a light kitchen towel draped nearby and cover items between guest waves if needed
- The board actually looks more generous and welcoming when refreshed midway through your gathering—this isn't failure, it's hospitality
 Save
Save A great board isn't about perfection—it's about generosity and welcome. When you gather people around food you've thoughtfully arranged, you're telling them that their presence matters enough to do something beautiful, and that's what they'll actually remember.
Recipe FAQ
- → How should I arrange the cheeses and accompaniments?
Place cheese blocks and wedges evenly spaced on a large board, then fill gaps with crackers, bread slices, fruits, nuts, and garnishes for an inviting display.
- → Can I customize the cheese selection?
Absolutely. Feel free to swap cheeses based on taste preferences or availability to suit your guests.
- → How can I accommodate gluten-free guests?
Include gluten-free crackers or substitute sliced cucumbers for bread to ensure options for gluten-sensitive guests.
- → What condiments complement this spread?
Honey, fig or apricot jam, and whole grain mustard add sweet and tangy notes that pair well with cheeses and nuts.
- → How do I serve this spread for easy guest access?
Provide small cheese knives, spreaders, toothpicks, and cocktail forks, allowing guests to serve themselves comfortably.