 Save
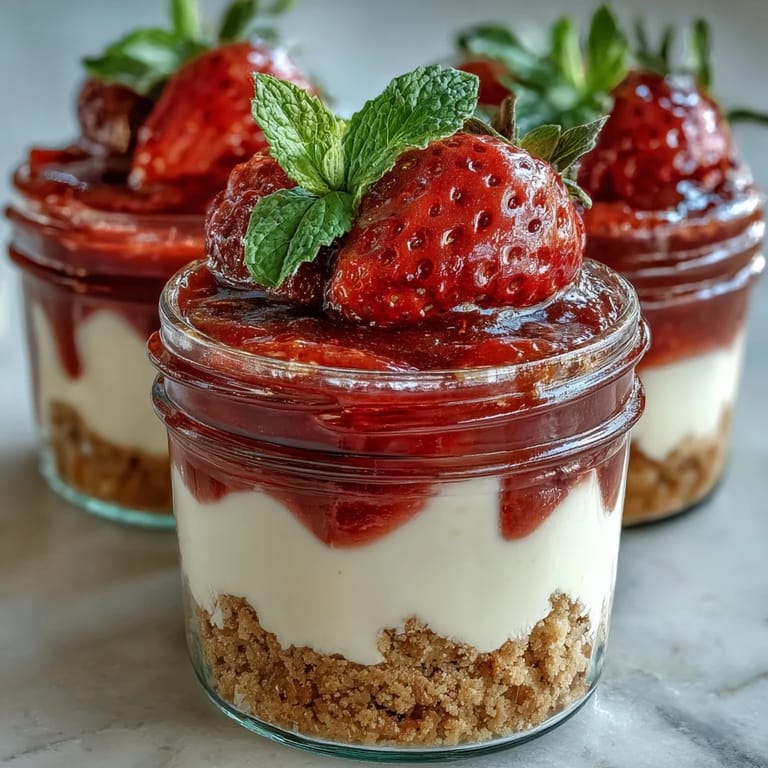
Save The first time I made these No-Bake Strawberry Cheesecake Jars, the scent of freshly hulled strawberries filled my kitchen and mingled with the subtle tang of lemon zest. I was drawn in by the promise of creamy layers without having to turn on the oven. The gentle sound of a hand mixer whipping cream, and the anticipation of tasting something cool and decadent on a warm afternoon, felt like the perfect spring treat. There is something undeniably cheerful about assembling individual jars; I found myself smiling mid-prep, envisioning how they'd look lined up on the table.
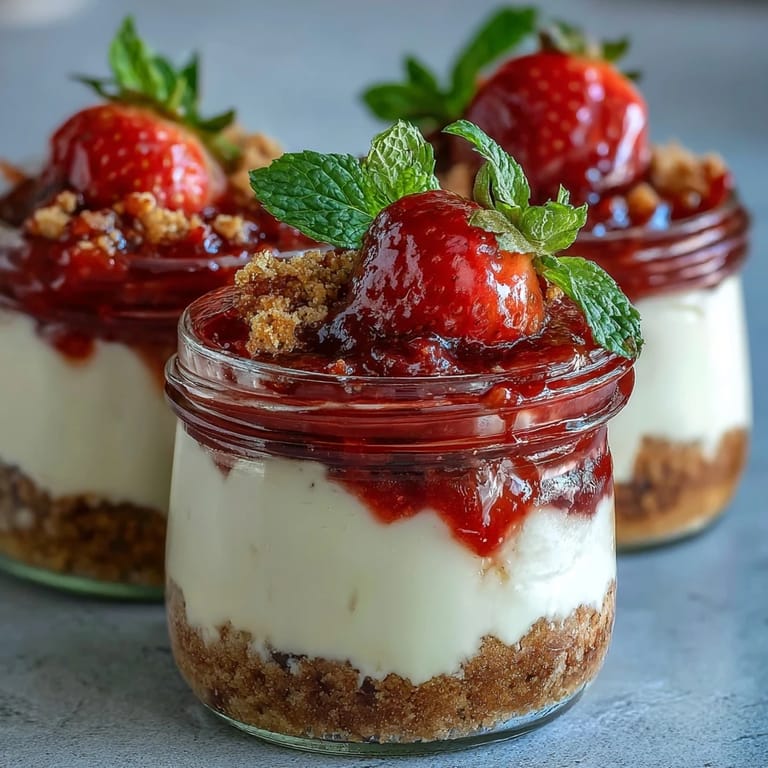
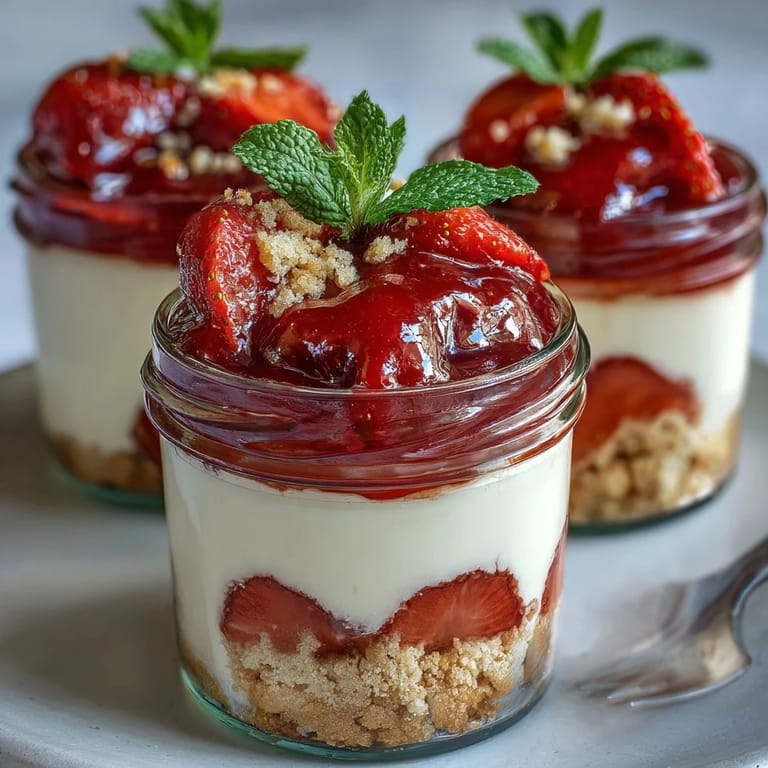
Setting out these jars after dinner with friends, I watched their faces light up as they dipped spoons through crumbly biscuit, dreamy cheesecake, and bright compote. We joked about which layer was the best, and the mint garnish became a conversation starter. Someone spilled a little compote onto the table and it just added to the laughter & my favorite kind of mess. There’s something about sharing miniature desserts that turns grown-ups into kids—no one wanted to wait for theirs to chill.
Ingredients
- Graham crackers or digestive biscuits: I discovered they make the perfect base, especially when crushed just enough to keep a little texture—pressing them too hard can make the layer tough.
- Unsalted butter: Melted butter binds the crumbs and lends a rich flavor; it’s easiest to mix when still warm, but don’t let it get too hot.
- Cream cheese: Softened cream cheese blends without lumps—leaving it on the counter for 20 minutes before mixing makes all the difference.
- Whipping cream: Cold cream is key for airy peaks; whipping it just until soft makes the cheesecake light but sturdy.
- Powdered sugar: Sifts in smoothly and brings gentle sweetness—no grainy bite.
- Vanilla extract: Just a teaspoon adds warmth and depth that rounds out the flavors.
- Lemon zest: The zest lifts everything—use a microplane for fragrant, fine shavings.
- Fresh strawberries: Chopped strawberries cook down into a beautifully chunky compote; fresher berries give a brighter finish.
- Sugar: Balances the fruit and brings out juicy syrup in the compote.
- Lemon juice: Helps keep the compote vivid and prevents it from tasting flat.
- Whole strawberries & mint leaves: The garnish turns each jar into a showpiece; a quick rinse and pat dry keeps them picture-perfect.
Tired of Takeout? 🥡
Get 10 meals you can make faster than delivery arrives. Seriously.
One email. No spam. Unsubscribe anytime.
Instructions
- Build the biscuit base:
- Pour crushed biscuits and melted butter into a mixing bowl, then use your fingertips to blend until every crumb glistens. Scoop the mixture into each jar, gently pressing with a spoon & you might hear a satisfying crunch as you compact it.
- Blend the cheesecake layer:
- Beat softened cream cheese, powdered sugar, vanilla, and lemon zest until creamy and smooth—don’t rush, you’ll see the texture go from grainy to glossy. Whip cold cream in a separate bowl; listen for the quiet swish as it thickens, then fold it into the cream cheese mixture slowly so it stays airy.
- Fill each jar:
- Spoon the cheesecake filling over the biscuit base, smoothing the top with the back of a spoon. The layers should stand out, like stripes, once you peek through the glass.
- Chill the jars:
- Cover and refrigerate for at least two hours; this is the part where anticipation builds, and the cheesecake firms beautifully.
- Make the strawberry compote:
- Simmer strawberries, sugar, and lemon juice in a small saucepan, stirring occasionally. When the berries soften and sauce thickens, turn off the heat and let it cool—your kitchen will smell incredible.
- Assemble and garnish:
- Once jars have chilled, spoon compote over each cheesecake layer, letting some syrup dribble down. Top with a whole strawberry and mint leaf for extra charm, then serve them chilled.
 Save
Save I once brought these jars to a picnic, and as we unpacked them from the cooler, someone said they looked like tiny edible bouquets. That afternoon, the dessert became the center of smiles and everyone wanted to know how such gorgeous jars could be so easy. One guest even took a jar home for later, insisting it was too pretty to finish all at once.
Jars that Make Dessert Simple
Using individual jars means you can prep and portion ahead, skip worrying about perfect slices, and keep each serving fresh. The jars help the cheesecake layer set quicker, too—especially when you’re pressed for time or feeding a crowd.
Flavor Swaps and Garnishes
Once, I swapped strawberries for blueberries and the compote came out with a deeper color and flavor; raspberries add a hint of tartness if you prefer. Experimenting with garnishes—like candied lemon or edible petals—turned the dessert into a whimsically elegant treat for spring celebrations.
Last Touches and Easy Prep
Prepping the jars is nearly mess-free and you can make them up to a day in advance; the flavors bloom overnight and the base softens just right. When serving, set out extra mint sprigs for guests to add their own, and remind yourself that a little compote spill is nothing but proof of good food and good company.
- Keep a towel nearby for easy cleanup.
- If you layer while the compote is still warm, the cheesecake may melt—let it cool first.
- Don’t forget to double-check your jars for cracks before filling them.
 Save
Save Whether you’re celebrating or just craving something joyful, these strawberry cheesecake jars always deliver a little magic in every spoonful. Share them with friends or savor one in quiet—either way, they’re bound to make your day a bit brighter.
Recipe FAQ
- → Can I make these jars ahead of time?
Yes, you can prepare the jars up to 24 hours in advance. This enhances flavor and makes serving easier.
- → How do I make them gluten-free?
Simply use gluten-free biscuits for the base and ensure all other ingredients are certified gluten-free.
- → Can I use other berries for the compote?
Yes, raspberries or blueberries can be substituted to vary flavor and color in the compote layer.
- → What tools are required?
You will need jars, mixing bowls, a hand mixer or stand mixer, a saucepan, and a spoon or spatula.
- → Is chilling necessary?
Chilling for at least 2 hours is essential to set the cheesecake layer and enhance flavors.
- → Are these suitable for vegetarians?
Yes, all the ingredients are vegetarian-friendly. Always check labels for potential allergens.