 Save
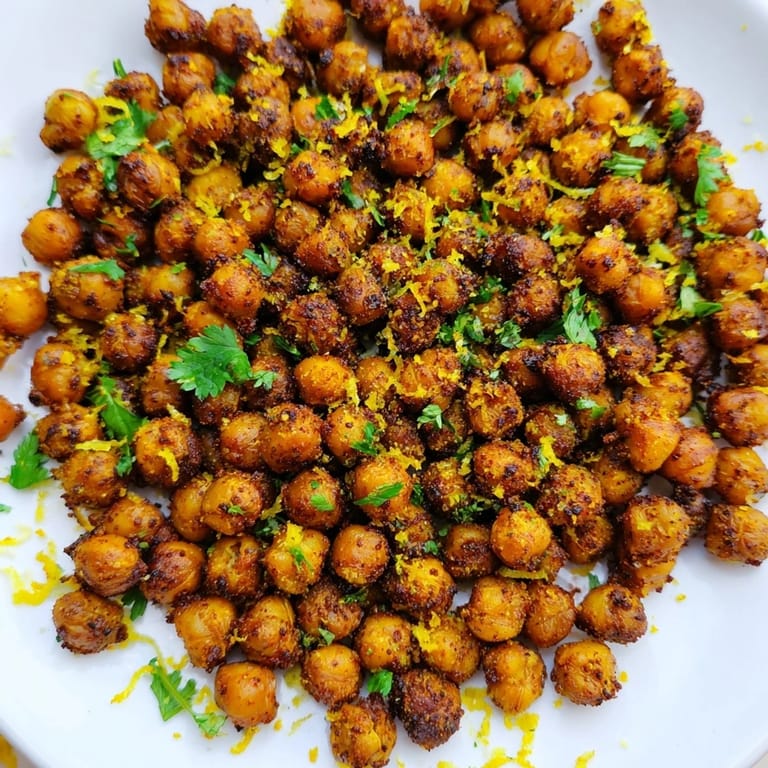
Save My friend showed up to a dinner party with a container of these golden, crackling chickpeas, and I couldn't stop eating them straight from the bowl. There's something magnetic about the combination of harissa's smoky heat and that satisfying crunch that makes you reach for just one more handful. Once I figured out the trick to getting them truly crispy, I started making them constantly—for parties, for snacking during work, for topping salads when I wanted something with actual personality.
I made these for my book club meeting thinking they'd be a cute side snack, and instead people started asking for the recipe before the meeting even started. Someone brought them to their office the next week, and suddenly I was the person known for the spicy chickpeas. It's a strange kind of glory, but honestly, I'll take it.
Ingredients
- Cooked chickpeas (2 cups, about 1 can, 400 g): Drain and rinse them thoroughly—this removes the starch that actually prevents crisping, so don't skip this step even though it feels unnecessary.
- Olive oil (1½ tablespoons): This is your crisping agent, so use good quality oil and coat everything evenly or you'll end up with some soggy pieces.
- Harissa spice blend (1 tablespoon): Buy it from the spice section or make your own if you're feeling ambitious—store-bought versions vary wildly in heat, so taste as you go.
- Smoked paprika (½ teaspoon): This adds depth and that campfire-like flavor that makes people ask what your secret ingredient is.
- Ground cumin (½ teaspoon): It rounds out the harissa's sharp edges and adds a warm, slightly nutty note.
- Garlic powder (½ teaspoon): Fresh garlic will burn at this temperature, so powder is your friend here.
- Sea salt (½ teaspoon): Start with this amount and adjust—remember the chickpeas will intensify flavors as they roast.
- Lemon zest and fresh herbs (optional): Add these right after roasting while everything's still hot so they stick and brighten the whole thing up.
Tired of Takeout? 🥡
Get 10 meals you can make faster than delivery arrives. Seriously.
One email. No spam. Unsubscribe anytime.
Instructions
- Get Your Oven Ready:
- Preheat to 400°F and line a baking sheet with parchment paper so cleanup is actually painless and nothing sticks.
- Dry Those Chickpeas:
- Pat them completely dry with a clean towel and peel off any loose skins you see—this is tedious but genuinely the difference between chewy and crispy. I usually do this while listening to a podcast so it doesn't feel like wasted time.
- Coat Everything Evenly:
- Toss the chickpeas with oil and all your spices in a large bowl until every single one is coated. I use my hands because you can actually feel when you've missed some.
- Spread Them Out:
- Arrange them in a single layer on the baking sheet—they need space to crisp up, not steam each other.
- Roast With Intention:
- Roast for 30-35 minutes, shaking the pan halfway through so the bottom ones don't burn while the top ones are still pale. You're looking for a deep golden color, almost like caramel.
- Finish While Hot:
- Toss with lemon zest and herbs right out of the oven when everything's still hot and will stick to the chickpeas.
- Cool Before Eating:
- I know it's hard to wait, but letting them cool for a few minutes actually helps them firm up and reach maximum crunch.
 Save
Save My partner has started requesting these instead of cookies, which tells me everything about how completely they've become a regular thing in our kitchen. There's something satisfying about having a snack that feels indulgent but is actually just chickpeas and spices and basically good for you.
Customizing Your Heat
Harissa varies wildly depending on the brand, so taste your spice blend before you commit it all to the chickpeas. If you want more heat, add a pinch of cayenne right into the oil mixture—it distributes better that way than if you sprinkle it in at the end. If your harissa is already intense, you can dial back the amount and add a little more cumin or paprika for volume.
Ways to Use Them
These aren't just a snack, even though that's their best use. I've crushed them over hummus for texture, scattered them on grain bowls for crunch, and even thrown them into a salad right before serving so they don't get soggy. They're also shockingly good alongside a cheese board if you want something savory and spiced among all the mild things.
Storage and Keeping Them Crispy
Keep them in an airtight container and they'll stay crispy for about three days—after that they start softening even in a sealed container because that's just what chickpeas do. If they get soft and you want them again, spread them on a baking sheet and roast at 350°F for about five minutes until they snap again. This recipe actually gets better if you're thinking about meal prep because you can make a big batch and resurrect it throughout the week.
- Use a glass container instead of plastic if you have one—it actually keeps them crisper somehow.
- If you add the lemon zest right before storage, it stays fresher than if you zest it earlier.
- Make a double batch because they disappear faster than you'd think and you'll want more on day two.
 Save
Save These little golden bites have somehow become one of my most-requested recipes, which is wild for something so simple. Once you make them, you'll understand why.
Recipe FAQ
- → How do I get the chickpeas crispy?
Thoroughly pat chickpeas dry and remove loose skins before roasting. Spread evenly on a baking sheet and roast at 400°F, shaking halfway through to ensure even crisping.
- → Can I adjust the spice level?
Yes, adding a pinch of cayenne pepper will increase the heat. You can also adjust the amount of harissa spice blend to suit your taste.
- → What can I serve these chickpeas with?
They make a great snack on their own, a crunchy salad topper, or an addition to grain bowls for extra texture and flavor.
- → How should I store leftover roasted chickpeas?
Store them in an airtight container for up to 3 days. If they soften, re-crisp them in a hot oven for a few minutes before serving.
- → Are these chickpeas gluten-free and vegan?
Yes, this dish is naturally vegan and gluten-free, making it suitable for many dietary preferences.