 Save
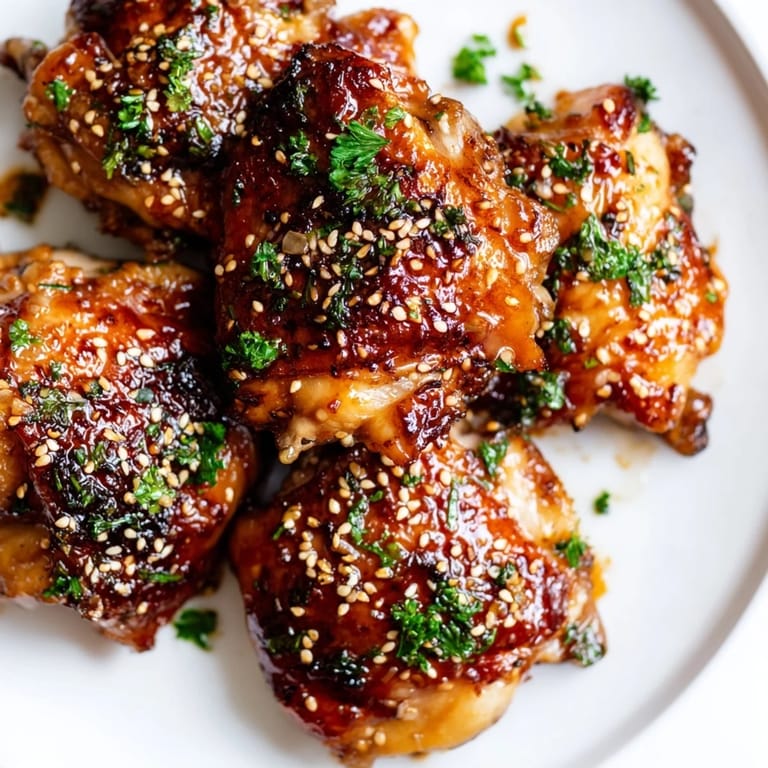
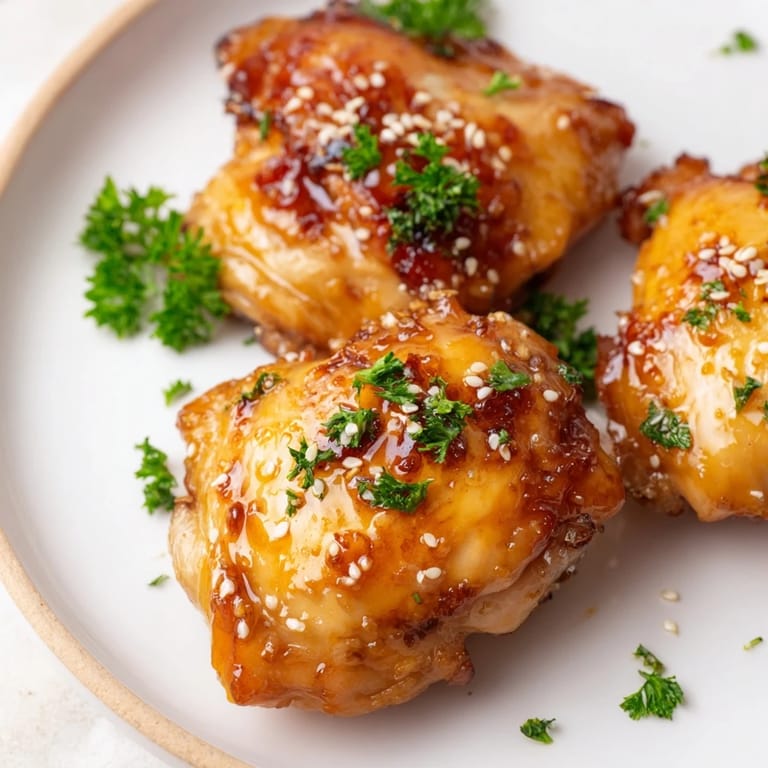
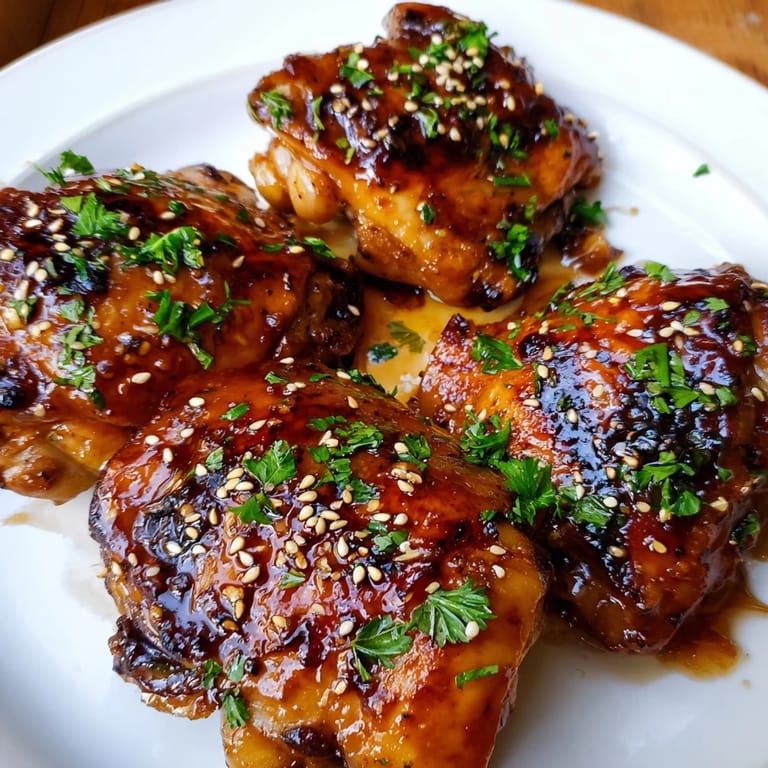
Save There's something about the sizzle of chicken hitting hot oil that signals the start of something good. I discovered this honey garlic glaze on a weeknight when I was tired of the same rotation and wanted something that tasted impressive without the fuss. The magic happens fast—tender thighs coated in this sticky, sweet-savory glaze that caramelizes into burnished perfection. Every time I make it, the kitchen fills with this rich, garlicky-sweet aroma that pulls everyone to the stove before dinner's even ready.
I made this for my sister's unannounced visit, and she showed up just as the chicken went into the oven. The timing couldn't have been better—we sat down barely thirty minutes later, and she took one bite and her eyes went wide. She's made it five times since then and keeps texting me photos. That's when I knew this wasn't just a weeknight dinner; it was the kind of recipe that becomes a regular at someone's table.
Ingredients
- 8 bone-in, skin-on chicken thighs: They're forgiving, flavorful, and nearly impossible to dry out—way more reliable than breasts if you're cooking for people who matter.
- 1/2 tsp salt and 1/4 tsp black pepper: Season generously before searing; this sets the foundation for everything that comes next.
- 1/3 cup honey: Use the good stuff if you can; it caramelizes better and tastes noticeably different than cheaper varieties.
- 1/4 cup low-sodium soy sauce: Low-sodium lets the honey shine and keeps you from drowning in salt—trust me on this one.
- 4 cloves garlic, minced: Mince it fresh, not from a jar; the difference in flavor is worth those thirty seconds of knife work.
- 1 tbsp rice vinegar or apple cider vinegar: A little acid cuts through the sweetness and prevents the glaze from being one-note.
- 2 tbsp water: This thins the glaze so it actually coats the chicken instead of sitting as a thick puddle.
- 1 tbsp olive oil: Use it to get that first golden sear; don't skip this step or you'll regret it.
- 1/2 tsp crushed red pepper flakes (optional): I add them every time—a whisper of heat makes the sweetness taste even better.
- 2 tbsp chopped fresh parsley or green onions: This bright garnish wakes up the dish and makes it look like you actually tried.
- 1 tsp toasted sesame seeds (optional): They add a nutty depth and make people think you're fancier than you are.
Tired of Takeout? 🥡
Get 10 meals you can make faster than delivery arrives. Seriously.
One email. No spam. Unsubscribe anytime.
Instructions
- Get your oven ready:
- Preheat to 400°F. This matters—a cold oven means the chicken finishes before the skin gets crispy, and that's a missed opportunity.
- Dry and season your chicken:
- Pat those thighs completely dry with paper towels; moisture is the enemy of crispy skin. Season both sides generously with salt and pepper and let them sit for a minute while you gather the rest of your ingredients.
- Sear until golden:
- Heat olive oil in your oven-safe skillet over medium-high heat until it shimmers. Place chicken skin-side down and don't move it for 3–4 minutes—this is where the magic starts. You'll hear it sizzle, see the skin turn golden, and smell something that makes you close your eyes for a second. Flip carefully and cook 2 minutes more, then transfer to a plate.
- Build your glaze:
- In the same skillet (those browned bits are flavor gold), add minced garlic and sauté for about 30 seconds until fragrant but not burnt. Quickly add honey, soy sauce, vinegar, water, and red pepper flakes if using. Stir everything together and let it come to a gentle simmer—you want bubbles, not a rolling boil.
- Reunite chicken and glaze:
- Return the chicken thighs to the skillet skin-side up. Spoon that glossy glaze over top, coating everything generously. The chicken will be partially submerged, and that's perfect.
- Bake and baste:
- Transfer the whole skillet to the oven and bake for 18–22 minutes. Halfway through, pull it out and baste the chicken with the glaze using a spoon or basting brush—this is the step that makes the difference between good and unforgettable. The skin will darken and the glaze will thicken and cling to the meat like a caramelized coating.
- Rest before serving:
- Pull the skillet from the oven and let the chicken rest for 5 minutes. This lets the juices settle so you don't lose them the second you bite in.
- Finish and garnish:
- Scatter fresh parsley or green onions over top and sprinkle with toasted sesame seeds if you have them. Serve immediately while everything's still hot and the glaze is glossy.
 Save
Save My neighbor came over for lunch one day and mentioned she never makes chicken anymore because it always comes out boring. I made her this, and she spent the whole meal asking questions and taking notes on her phone. Two weeks later she brought me a container of her own attempt, and it was just as good as mine. That's when I realized this recipe has that rare quality of being impressive enough for guests but approachable enough that other home cooks actually feel confident making it.
The Science Behind the Caramelization
What makes this glaze so addictive is the balance between honey, acid, and salt. When the honey hits the heat in the skillet, it begins to caramelize—the natural sugars break down and deepen into darker, more complex flavors. The soy sauce adds umami and salt, which amplifies the sweetness without making it cloying. The vinegar cuts through the richness and prevents the glaze from tasting flat. It's not magic; it's chemistry, and understanding this makes you a better cook because you know why each ingredient matters.
Customization Without Apology
I've made this recipe dozens of ways depending on what I have on hand or what mood I'm in. Sometimes I use chicken breasts instead of thighs—just reduce the baking time to 15 minutes and watch carefully so they don't dry out. I've swapped apple cider vinegar for rice vinegar and couldn't tell a meaningful difference. One night I added a teaspoon of ginger to the glaze, and it elevated the whole dish in a subtle way. Substitute boneless thighs or breasts if that's what's in your fridge; what matters is the glaze technique, not the specific cut of chicken.
From Skillet to Table
This recipe teaches you something important about one-pan cooking: a heavy, oven-safe skillet becomes your entire kitchen. You sear in it, build your sauce in it, and finish it in the oven—no transferring, minimal washing. Serve it straight from the skillet if you want to look effortless and sophisticated, or transfer it to a platter if you're feeding a crowd and need the skillet back for something else. For a complete meal, pair this with steamed rice and stir-fried vegetables; the glaze is rich enough that simple sides are all you need.
- For extra-crispy skin, broil the finished chicken for 2–3 minutes under high heat—watch it carefully so the glaze doesn't burn.
- Pair this with jasmine rice to soak up every drop of the glaze, or use it over steamed broccoli if you want something lighter.
- Leftovers reheat beautifully in a 350°F oven for about 10 minutes, and the glaze actually tastes richer the next day.
 Save
Save This is the kind of recipe that teaches you confidence in the kitchen. It looks fancy enough to impress, simple enough not to stress over, and forgiving enough that you'll want to make it again and again until it becomes as natural as breathing.
Recipe FAQ
- → What type of chicken works best for this dish?
Bone-in, skin-on chicken thighs provide the best flavor and texture, staying juicy and developing a crispy, caramelized skin.
- → Can I use boneless chicken instead?
Boneless thighs or breasts can be used but require a shorter cooking time to avoid drying out.
- → How do I get the glaze to stick well to the chicken?
Searing the skin until golden creates a crispy base, allowing the glaze to cling and caramelize beautifully during baking.
- → What can I substitute for soy sauce for a gluten-free option?
Tamari or certified gluten-free soy sauce are great alternatives that maintain the savory depth without gluten.
- → Is it necessary to broil at the end of cooking?
Broiling for 2-3 minutes crisps the skin further, enhancing texture, but can be skipped if preferred.